
150 psi porter cable air compressor manual
Porter-Cable’s C2002 model delivers 150 PSI, a versatile tool for various tasks. Accessing the manual, like finding instructions to replace the regulator, ensures optimal performance.
This compressor is a popular choice, and understanding its features through the provided documentation is crucial for safe and efficient operation.
Overview of the C2002 Model
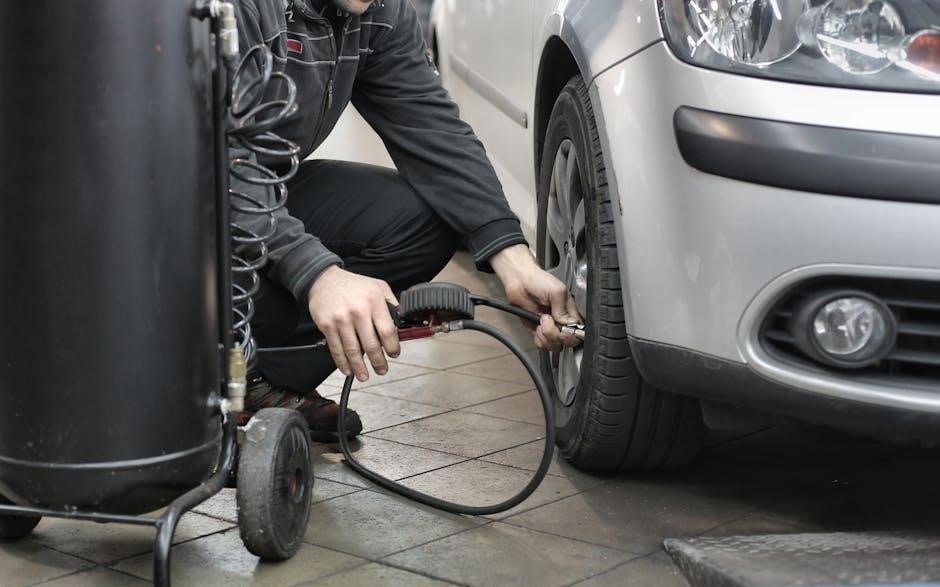
The Porter-Cable C2002 is a 6-gallon, 150 PSI air compressor designed for portability and a wide range of applications, from inflating tires to powering nail guns. It features a durable construction and a powerful motor, making it suitable for both DIY enthusiasts and professionals.
This model boasts a peak horsepower of 1.5 HP, delivering consistent airflow for demanding tasks. The manual provides detailed information on its specifications, including air delivery at 90 PSI, which is crucial for understanding its capabilities.
Key features include an easy-to-read gauge, a regulator for precise pressure control, and a quick-connect coupler for hassle-free tool attachment. Proper maintenance, as outlined in the manual, ensures longevity and optimal performance. Understanding the components, like the regulator, is vital for troubleshooting and repair.
Importance of the Manual
The Porter-Cable C2002 air compressor manual is an indispensable resource for safe and effective operation. It details crucial safety precautions, component identification, and step-by-step operating instructions. Ignoring the manual can lead to improper use, potential hazards, and voided warranty coverage.
Specifically, the manual provides guidance on essential maintenance procedures, such as draining the tank to prevent corrosion and replacing parts like the regulator – a process clearly outlined with instructions and diagrams.
Troubleshooting common issues, like the compressor not starting or experiencing air leaks, is significantly easier with the manual’s diagnostic assistance. Accessing the manual online, as demonstrated by available resources, ensures users always have this vital information at their fingertips for their 150 PSI compressor.
Safety Precautions
Always release air pressure before maintenance, unplug the unit, and review all safety rules detailed in the manual for hazard prevention.
General Safety Rules
Before operating the Porter-Cable 150 PSI air compressor, carefully read and understand the entire instruction manual. Always wear appropriate eye protection to prevent injury from flying debris. Ensure the work area is well-ventilated, as the compressor emits exhaust fumes. Never operate the compressor if the power cord or plug is damaged.
Keep children and bystanders away from the operating compressor. Do not attempt to modify the compressor in any way, as this could compromise its safety features. Always disconnect the power supply before performing any maintenance or repairs. Avoid operating the compressor in damp or wet environments. Regularly inspect the air hose for damage and replace it if necessary.
Never point the air nozzle towards yourself or others. Be mindful of the noise level and wear hearing protection if necessary.
Air Compressor Specific Hazards
The Porter-Cable 150 PSI air compressor presents unique hazards beyond general power tool safety. High pressure air can cause severe injuries if misdirected. Always release all air pressure before disconnecting hoses or performing maintenance, as residual pressure remains in the tank.
Never attempt to repair the tank itself; it’s a pressure vessel and requires professional attention. Be aware of potential noise levels, requiring hearing protection during extended use. Hot surfaces on the motor and tank pose burn risks – allow cooling before touching.
Improper grounding can lead to electrical shock. Ensure the compressor is properly grounded according to the manual’s instructions. Regularly drain the tank to prevent corrosion and maintain safe operation. Failure to heed these warnings can result in serious injury.
Component Identification
Key components include the air tank, motor, regulator, and gauges. Understanding their location, as detailed in the manual, is vital for operation and maintenance.
Air Tank and Motor
The air tank, a crucial component of the Porter-Cable C2002, stores compressed air, providing a reserve for powering tools. Its capacity determines the duration of tool use before the motor cycles on to replenish the air supply. Regularly draining the tank, as outlined in the manual, is essential to prevent corrosion and maintain optimal performance.
The motor drives the compressor pump, converting electrical energy into mechanical energy to compress air. It’s vital to ensure the unit is unplugged before any maintenance, like regulator replacement, is performed. Proper ventilation around the motor is also important to prevent overheating and ensure longevity. The manual provides specific details regarding motor specifications and maintenance procedures.
Regulator and Gauges
The regulator controls the output air pressure delivered to tools, allowing users to adjust it to suit specific application requirements. Located on the compressor, it’s typically labeled with pressure markings for easy adjustment, as detailed in the manual. Understanding how to adjust the regulator is key to preventing tool damage or inefficient operation.
The gauges provide visual indication of air pressure within the tank and the regulated output pressure. Monitoring these gauges is crucial for safe and effective operation. The manual highlights the importance of checking these readings regularly. Replacing faulty gauges, using a 7/16 wrench, is a maintenance task covered in the documentation.

Operating Instructions
Before use, ensure proper setup, including connecting an air hose and verifying all connections are secure. Always unplug the unit during maintenance procedures.
Initial Setup
Prior to the first use, carefully inspect the Porter-Cable C2002 air compressor for any shipping damage. Ensure the compressor is placed on a stable, level surface with adequate ventilation. Connect an appropriate air hose to the compressor’s outlet fitting, securing it tightly.
Verify the air filter is clean and properly installed. Before plugging in the power cord, confirm the voltage matches your power supply. It’s essential to drain any accumulated moisture from the tank before initial operation. Familiarize yourself with the location of the regulator and gauges for future adjustments.
Double-check all connections and ensure the pressure switch is in the ‘off’ position. This initial setup will contribute to the longevity and safe operation of your compressor.
Starting and Stopping the Compressor
To start the compressor, ensure the power cord is securely plugged into a grounded outlet and the pressure switch is set to ‘ON’. The motor will initiate, and the compressor will begin filling the air tank. Monitor the pressure gauge; the compressor will automatically shut off when it reaches the pre-set maximum pressure (150 PSI).
To stop the compressor, simply switch the pressure switch to the ‘OFF’ position. This will immediately halt the motor. Always release air pressure from the tank before performing any maintenance or storage. Avoid frequent on/off cycling, as this can reduce the compressor’s lifespan.
Remember to unplug the unit when not in use for extended periods.
Adjusting Air Pressure
The regulator, marked with pressure readings, allows precise control. Adjust it to match your tool’s requirements for optimal performance and safety.
Locating the Regulator
Identifying the regulator on your PORTER-CABLE C2002-ECOM air compressor is the first step in adjusting air pressure. Typically, this component is prominently positioned on the front or top surface of the unit, making it easily accessible during operation.
Look for a dial or knob clearly labeled with pressure markings, usually in PSI (pounds per square inch). These markings indicate the current output pressure of the compressor. The regulator itself is often housed within a small, protective casing. It’s crucial to familiarize yourself with its exact location before attempting any adjustments, ensuring a smooth and controlled process.
Referencing the manual can provide a visual aid, pinpointing the regulator’s position with a diagram or illustration.
Step-by-Step Pressure Adjustment Guide
Adjusting air pressure on the PORTER-CABLE C2002 is straightforward. First, locate the regulator – usually front or top-mounted, displaying pressure markings. To increase pressure, turn the regulator knob clockwise; to decrease, turn it counterclockwise.
Observe the gauge while adjusting, aiming for your desired PSI. Make small adjustments, allowing the pressure to stabilize between each turn. Always ensure the pressure doesn’t exceed the maximum rating of your air tools.
Before operation, double-check the set pressure. Remember to release all air pressure from the tank before performing any maintenance, as outlined in the manual. Consistent monitoring ensures optimal performance and tool longevity.

Maintenance and Troubleshooting

Regular maintenance, such as draining the tank, is vital. Troubleshooting common issues like compressor failure or air leaks is covered in the manual.
Following these guidelines ensures longevity and optimal performance of your Porter-Cable compressor.
Draining the Tank
Regularly draining the air tank is a crucial maintenance step for your Porter-Cable 150 PSI air compressor. Moisture buildup inside the tank can lead to corrosion and reduce the compressor’s efficiency, potentially causing damage over time.
To drain the tank, first, release all air pressure. This is a vital safety precaution. Then, locate the drain valve, typically found at the bottom of the tank. Carefully open the valve, allowing the accumulated water and debris to drain completely.
Ensure you have a container positioned to catch the discharge. Once the tank is fully drained, close the valve securely. This simple procedure, performed routinely, will significantly extend the life of your air compressor and maintain its optimal performance. Refer to your manual for specific valve locations.
Replacing the Regulator
Replacing the regulator on your Porter-Cable C2002 150 PSI air compressor requires careful attention to safety and procedure. Before beginning, release all air pressure from the tank and unplug the unit to prevent accidental operation. Removing the console cover provides access to the regulator assembly.
Using an adjustable wrench or the specified wrench (often 7/16 inch), carefully remove the existing gauges connected to the regulator. Disconnect the regulator itself, noting the orientation of any connecting lines or fittings. Install the new regulator, ensuring a secure connection and proper alignment.
Reattach the gauges and replace the console cover. Always double-check all connections for tightness before restoring power and testing the compressor’s functionality. Consult the manual for detailed diagrams and specific instructions.
Common Issues and Solutions
Troubleshooting often involves a compressor that won’t start or experiences air leaks. Refer to the manual for diagnosing and resolving these frequent problems efficiently.
Compressor Not Starting
If your Porter-Cable C2002 compressor fails to start, several factors could be at play. First, ensure the unit is properly plugged in and the power switch is engaged. A tripped circuit breaker or blown fuse should also be investigated and reset or replaced accordingly.
Check the air tank pressure; the compressor won’t start if pressure is already at the maximum PSI. Consult the manual for specific troubleshooting steps related to the motor or internal components. A faulty start capacitor or a worn-out motor winding could also be the culprit, potentially requiring professional repair or part replacement.
Always disconnect the power before inspecting any internal parts. Referencing the exploded view diagram in the manual can aid in identifying components and understanding their function.
Air Leaks
Air leaks in your Porter-Cable C2002 compressor can reduce performance and efficiency. Begin by checking the air hose connections and ensuring they are tight. Inspect the fittings on the tank, regulator, and gauges for any signs of damage or looseness. Soap and water solution applied to suspected leak areas can help pinpoint the source – bubbles will form where air is escaping.
The manual details component locations, aiding in leak detection. A faulty check valve can also cause leaks, allowing air to escape from the tank when the compressor is off. Replacing the regulator, as outlined in the manual, might resolve leaks originating from that component.
Always release air pressure before attempting any repairs. Ignoring air leaks can lead to reduced tool performance and potential safety hazards.
Parts List and Diagrams
Detailed exploded views and comprehensive parts lists are available within the Porter-Cable C2002 manual, facilitating easy identification and replacement of components.
Exploded View of the Compressor
The Porter-Cable C2002 air compressor’s exploded view, found within the manual, is a crucial resource for understanding the assembly of this powerful tool. This detailed diagram meticulously illustrates each component, from the air tank and motor to the regulator and gauges, presented in a layered, deconstructed format.
Each part is clearly labeled with a corresponding reference number, allowing for easy identification when ordering replacements or performing maintenance. The diagram showcases the precise positioning of every bolt, hose, and fitting, providing a visual guide for disassembly and reassembly. This visual aid is invaluable for tackling repairs and ensuring the compressor functions optimally. Accessing this diagram through the manual simplifies complex maintenance tasks.
Ordering Replacement Parts
Securing replacement parts for your Porter-Cable C2002 air compressor is streamlined with the aid of the manual’s detailed parts list. This list, often accompanying the exploded view, provides part numbers for every component, facilitating accurate ordering. Referencing these numbers ensures you receive the correct replacement, preventing compatibility issues.
Several online retailers and authorized Porter-Cable service centers stock these parts. When ordering, always verify the part number against the manual to avoid errors. Providing the model number (C2002) is also crucial. Maintaining a readily available parts list, extracted from the manual, will minimize downtime and keep your compressor operating efficiently. Proper part identification is key to successful repairs.
Warranty Information
Porter-Cable offers coverage details within the manual, outlining claim processes for the C2002. Retain your proof of purchase for warranty service requests.
Coverage Details
Porter-Cable warranties cover defects in materials and workmanship for a specified period from the date of purchase. The length of coverage can vary, so carefully review the manual for precise terms. Typically, this warranty applies to normal residential use.
It does not cover damage resulting from misuse, abuse, neglect, accidents, improper maintenance, alterations, or unauthorized repairs. Consumable parts, like filters and seals, are often excluded. To obtain warranty service, the defective product, along with proof of purchase, must be returned to an authorized Porter-Cable service center.
The warranty provides for repair or replacement of the defective part, at Porter-Cable’s discretion. This warranty gives you specific legal rights, and other rights may vary by location.
Claim Process
To initiate a warranty claim for your Porter-Cable 150 PSI air compressor, first gather your original proof of purchase – a receipt or invoice is essential. Locate an authorized Porter-Cable service center; their website provides a locator tool. Contact the service center to discuss the issue and obtain a Return Merchandise Authorization (RMA) number.
Carefully package the compressor, preferably in its original packaging, and include a detailed description of the defect. Clearly mark the RMA number on the outside of the package. Ship the compressor to the designated service center, pre-paid, as Porter-Cable does not cover shipping costs for warranty claims.
Upon receipt, the service center will inspect the compressor and determine if the claim is valid. If approved, they will repair or replace the unit at their discretion.
Leave a Reply
You must be logged in to post a comment.