
origami hummingbird instructions
Origami Hummingbird Instructions: A Comprehensive Guide
Embark on a delightful paper-folding journey! This guide unveils the art of crafting origami hummingbirds, from simple beginner models to intricate, advanced designs.
Discover how tiny hands can create beautiful paper art, offering a fun and engaging activity for kids and adults alike, especially during extended time at home.
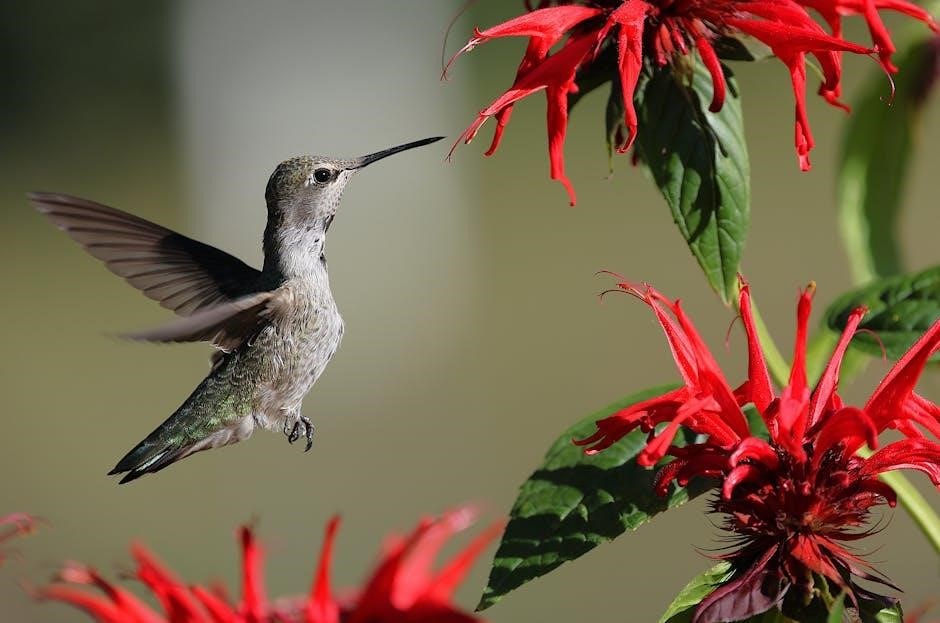
Origami, the ancient Japanese art of paper folding, offers a captivating blend of precision, creativity, and patience. Among the myriad of subjects suitable for this art form, the hummingbird stands out as a particularly enchanting choice. Its delicate form, vibrant colors, and energetic flight make it a compelling subject for origami artists of all skill levels.
This guide will navigate you through the process of creating origami hummingbirds, starting with foundational techniques and progressing to more complex models. Whether you’re a complete beginner or an experienced folder, you’ll find instructions tailored to your abilities. The beauty of origami lies in transforming a simple, flat sheet of paper into a three-dimensional representation of nature’s wonders.
Furthermore, origami provides a wonderful activity for children, fostering fine motor skills and concentration. It’s a screen-free pastime that encourages creativity and offers a sense of accomplishment. The whimsical nature of origami animals, like the hummingbird, sparks imagination and provides hours of entertainment.
Why Choose to Fold a Hummingbird?
Folding an origami hummingbird offers a unique and rewarding experience. These tiny, vibrant birds symbolize joy, adaptability, and resilience – qualities we can all appreciate. The process of creating a hummingbird from paper mirrors the bird’s own delicate balance and energetic nature, making it a particularly meaningful subject.
Beyond the symbolic significance, hummingbirds present an interesting challenge for origami artists. Their intricate wings and slender bodies require precise folds and careful shaping, pushing your skills to the next level. Successfully completing a hummingbird model provides a genuine sense of accomplishment.
Moreover, origami hummingbirds are a delightful way to connect with nature and appreciate its beauty. They serve as charming decorations, thoughtful gifts, or simply a source of personal enjoyment. Especially during times when outdoor activities are limited, bringing a touch of nature indoors through origami can be incredibly uplifting. It’s a fun activity for kids too!
Materials Needed for Origami Hummingbirds
To begin your origami hummingbird journey, you’ll need a few essential materials. The most crucial is, of course, paper! While any square paper will technically work, choosing the right type significantly impacts the final result. Lightweight origami paper (kami) is ideal for beginners due to its ease of folding and affordability.
For more detailed or advanced models, consider using thinner, higher-quality paper like tissue foil or Japanese washi paper. These papers hold creases sharply and allow for intricate shaping. A variety of colors can enhance the visual appeal of your hummingbirds, mimicking the iridescent plumage of real birds.
Beyond paper, a few helpful tools can streamline the process. A bone folder assists in creating crisp, clean creases. Tweezers can be useful for manipulating small details, especially in complex models. Finally, a flat, clean work surface is essential for precise folding. Having these materials prepared will set you up for success!
Basic Origami Folds Used
Mastering a few fundamental folds is key to unlocking the world of origami hummingbirds. These foundational techniques form the building blocks for even the most complex designs. The mountain fold creates a raised ridge, resembling a mountain peak – fold the paper upwards, bringing two points together. Conversely, a valley fold creates an indentation, like a valley – fold the paper downwards.
These two folds are the most common and will be used repeatedly throughout various hummingbird models. A slightly more advanced, yet crucial fold is the reverse fold. This technique involves folding a flap of paper inwards, reversing its direction. It’s essential for shaping the delicate features of the hummingbird, such as the beak and tail.
Practice these folds independently before attempting a full model. Understanding their mechanics will significantly improve your folding accuracy and overall enjoyment of the origami process. Don’t be discouraged if it takes time – patience is a virtue in origami!
Mountain Fold
The mountain fold is a cornerstone of origami, visually resembling a mountain’s peak. To execute this fold, begin with your paper placed flat. Identify the points you wish to connect and bring them together. Crucially, the fold line will rise above the surrounding paper surface, creating that characteristic raised ridge.
Ensure the crease is sharp and precise – a dull crease will compromise the final model’s structure. Use a firm, flat surface and perhaps a bone folder (or similar tool) to reinforce the fold. This technique is frequently used to define the wings and body of the hummingbird, providing structural integrity.
Think of it as building upwards; the paper is being lifted to create height. Mastering the mountain fold will dramatically improve the clarity and definition of your origami hummingbird. Practice makes perfect, so don’t hesitate to repeat this fold until it becomes second nature!
Valley Fold
The valley fold is the counterpart to the mountain fold, creating an indentation in the paper. Imagine a valley sinking downwards – that’s the visual cue; Bring the designated points of your paper together, but this time, the fold line will depress below the surrounding surface, forming a trough.
Like the mountain fold, precision is key. A crisp, well-defined valley fold is essential for a clean and accurate origami hummingbird. Utilize a hard, flat surface and consider using a bone folder to sharpen the crease; This fold is often employed to define the delicate curves of the hummingbird’s wings and tail.
Visualize the paper being pushed inwards. The valley fold provides depth and dimension to the model. Consistent practice will build your confidence and skill in executing this fundamental origami technique, leading to more refined hummingbird creations.
Reverse Fold
The reverse fold is a slightly more complex technique, crucial for shaping intricate details in origami hummingbirds. It involves folding a flap of paper inwards, but instead of simply creasing along an existing line, you’re essentially inverting the direction of the fold.
Begin by partially unfolding a previous fold. Then, gently push the paper inwards along the crease, reversing its direction. This creates a hidden fold within the model, allowing for nuanced shaping of the hummingbird’s beak, head, and tail feathers. Precision is paramount; a clean reverse fold contributes significantly to the realism of the final form.
Practice makes perfect! Mastering the reverse fold unlocks a new level of detail in your origami creations. It’s a technique that demands patience and a delicate touch, but the results are well worth the effort, bringing your paper hummingbird to life.
Simple Origami Hummingbird ⸺ Beginner Level
This beginner-friendly hummingbird model is perfect for those new to origami! It utilizes basic folds and requires minimal steps, making it an excellent starting point for young artists or anyone wanting a quick, satisfying project. Prepare to transform a simple square of paper into a charming representation of this vibrant bird.
We’ll begin with a square base, a fundamental structure in many origami designs. From there, we’ll focus on forming the wings, creating a gentle curve that suggests flight. Next, we’ll shape the tail, adding a touch of elegance to the hummingbird’s silhouette. Finally, we’ll delicately form the beak and head, completing our miniature masterpiece.
This project is a fantastic way to introduce children to the joys of origami, fostering creativity and fine motor skills. It’s a fun, screen-free activity that encourages patience and attention to detail.
Step 1: Starting with a Square Base
Begin with a perfectly square piece of origami paper, color-side down. Precision is key for a clean final model, so ensure your corners align neatly. The square base is a foundational fold used in countless origami creations, including our hummingbird.
First, fold the paper in half diagonally, creating a crisp crease. Unfold; Repeat this fold along the other diagonal, forming an ‘X’ crease across the square. Next, fold the paper in half horizontally, then vertically, creating a ‘+’ crease.
Now, carefully bring the top three corners down to meet the bottom corner, collapsing the paper into a smaller square. This requires gentle manipulation and precise alignment of the creases. You should now have a smaller square, with all four loose corners pointing towards you – this is your square base!
Step 2: Forming the Wings
With your square base established, it’s time to breathe life into our hummingbird by forming its delicate wings. Take the top layer of the right corner and fold it towards the center crease, creating a diagonal flap. Repeat this on the left side, mirroring the fold. These will become the foundational shapes of the wings.

Now, flip the entire model over. Repeat the previous step on this side – folding both top corners towards the center crease. You should now have a diamond-like shape with four triangular flaps extending from the center.
To refine the wing shape, perform an inside reverse fold on each of these flaps. This will narrow the wings and give them a more realistic, aerodynamic appearance. Remember, gentle precision is crucial for achieving graceful, bird-like wings!
Step 3: Creating the Tail
The hummingbird’s tail is essential for balance and adds to its elegant form. Locate the pointed end opposite the head. This section will become the tail. Perform a petal fold on this end – carefully unfold the layers and flatten them into a diamond shape. This creates the base for the tail feathers.
Next, make a series of small, precise reverse folds along the edges of this diamond shape. These folds will define the individual tail feathers, giving them a feathered appearance. The number of folds determines the density of the tail; more folds create a fuller tail.
Gently curve the tail feathers outward to mimic the natural spread of a hummingbird’s tail. Remember, patience and delicate handling are key to achieving a beautiful, realistic tail. This step truly brings the origami hummingbird to life!
Step 4: Shaping the Beak and Head
The beak and head are the focal points, requiring finesse and precision. Begin by performing a reverse fold at the front of the model, creating a pointed shape that will become the beak. The smaller and more refined this fold, the more realistic the beak will appear.
Next, gently shape the head by making small inward folds on either side of the beak; This creates the rounded form of the hummingbird’s head. Avoid sharp creases; aim for smooth, subtle curves. Consider the overall proportions – a delicate head complements the slender body.
Finally, slightly curl the beak downward to mimic the hummingbird’s characteristic feeding posture. This final touch adds a dynamic quality to your origami creation. Remember, practice makes perfect – don’t be afraid to experiment!
Intermediate Origami Hummingbird ⸺ More Detailed Design
Elevate your skills with a hummingbird boasting refined features! This model builds upon basic techniques, introducing the waterbomb base as a crucial starting point. Mastering preliminary folds is essential for achieving a symmetrical and structurally sound foundation.
The petal fold is key to creating realistic wing structures. This technique involves unfolding and reshaping layers of paper to form the delicate curves of the wings. Precision is paramount; ensure both wings are folded identically for balanced flight.
Refining the body shape involves subtle inward and outward folds, sculpting a more aerodynamic form. Pay attention to the proportions, creating a slender body that tapers gracefully towards the tail. This stage demands patience and a keen eye for detail.
Step 1: Preliminary Folds ─ Waterbomb Base
Begin with a square sheet of paper, colored side down. The waterbomb base is a fundamental structure in origami, serving as the foundation for many bird models, including our hummingbird. Initiate by folding the paper in half diagonally, creating a crisp crease. Repeat this fold along the other diagonal, forming an ‘X’ shape.
Next, fold the paper in half horizontally, and then vertically, creating a ‘+’ shape. Unfold the paper completely. You should now have crease lines dividing the square into quarters and along both diagonals. Carefully collapse the paper along these creases, bringing the corners together to form a smaller square.
This collapsing action will naturally create four triangular flaps. Ensure all layers align neatly. This completed square is your waterbomb base – the starting point for shaping the hummingbird’s body and wings. Precision at this stage is vital for a successful final model.
Step 2: Petal Fold for Wing Structure
With the waterbomb base established, we now introduce the petal fold. This technique is crucial for defining the hummingbird’s wing structure and creating a more dynamic shape. Take one of the top flaps and unfold it partially. Flatten it outwards, creating a diamond-like shape. Repeat this process on the opposite side, mirroring the first fold.
These unfolded flaps will become the foundation for the wings. Ensure the creases are sharp and symmetrical. The petal fold essentially opens up the layers, allowing for greater manipulation and detail in the subsequent steps. This step requires careful attention to detail to ensure both wings are evenly formed.
Repeat the petal fold on the remaining two flaps, creating a symmetrical structure with four ‘petals’ extending from the central body. This forms the basic wing shape, ready for further refinement and detailing.
Step 3: Refining the Body Shape
Now, let’s sculpt the hummingbird’s body for a more realistic form. After the petal folds, the model will appear somewhat bulky. We’ll use a series of inward folds to narrow the body and create a smoother, more streamlined silhouette. Begin by folding the sides of the body inwards towards the center crease, creating a tapered effect.
Pay close attention to maintaining symmetry; an uneven body will detract from the final appearance. These folds should be gentle and precise, avoiding harsh creases. Continue refining the shape by subtly adjusting the angles and curves. The goal is to achieve a graceful, elongated body that accurately reflects the hummingbird’s anatomy.
This stage is about subtle adjustments, shaping the paper to mimic the bird’s natural form. A well-defined body is essential for showcasing the delicate wings and tail feathers.
Step 4: Creating Detailed Wings and Tail Feathers
Bring your hummingbird to life with intricate wing and tail feather details! This is where artistry truly shines. Begin with the wings – carefully unfold portions of the petal folds, gently curving them upwards to simulate the arc of a hummingbird’s wings in flight. Small, precise creases will define individual feathers.
For the tail, employ similar techniques. Separate and slightly curl the paper layers to create the illusion of delicate tail feathers. Experiment with varying the angles and depths of these folds to achieve a natural, feathered appearance. Remember, hummingbirds have uniquely shaped tails, so observe references for accuracy.
These final touches transform the model from a basic shape into a recognizable and beautiful hummingbird. Patience and a delicate touch are key to achieving realistic feather details.
Advanced Origami Hummingbird ─ Complex Model
Prepare for a challenging yet rewarding origami experience! This advanced hummingbird model demands precision and mastery of complex folds. We begin with a variation of the bird base, requiring meticulous preliminary folds to establish the foundational structure. Expect numerous layers and intricate shaping.
Shaping the delicate beak is paramount. Utilizing reverse folds and inside reverse folds, carefully sculpt the long, slender beak characteristic of hummingbirds. This step requires patience and a keen eye for detail. Next, focus on intricate wing folding techniques, creating layered feathers and dynamic wing shapes.
Finally, achieving realistic proportions and form is crucial. Continuously refine the body, wings, and tail, referencing images of real hummingbirds to ensure anatomical accuracy. This model is a testament to origami skill and dedication.
Step 1: Complex Base Creation ⸺ Bird Base Variation
Initiate the advanced hummingbird with a modified bird base. Begin with a square sheet of paper, colored side down. Perform preliminary folds – diagonal creases both ways, then horizontal and vertical creases. Unfold, and collapse the paper into a waterbomb base. This forms the initial diamond shape, crucial for subsequent steps.
Now, deviate from the standard bird base. Instead of simply folding the side flaps to the center, perform an inside reverse fold on each flap, creating narrower points. These points will eventually become the wings and tail. Precision is key here; ensure symmetrical folds for a balanced model.
Flatten the resulting shape, and repeat the inside reverse fold on the top layers, further refining the wing and tail structures. This variation establishes a more streamlined body, essential for capturing the hummingbird’s elegant form.
Step 2: Shaping the Delicate Beak
The hummingbird’s beak demands precision and patience. Focusing on the narrow point representing the head, execute a series of intricate folds. Begin with a small inside reverse fold, creating a subtle curve that hints at the beak’s shape. This initial fold establishes the foundation for further refinement.
Next, perform another, even smaller inside reverse fold, narrowing the beak and defining its pointed tip. This requires delicate manipulation of the paper, ensuring a clean and sharp crease. Avoid excessive force, as the paper may tear.
To add realism, consider a slight outward curl to the beak using gentle shaping techniques. This subtle detail significantly enhances the hummingbird’s lifelike appearance. Remember, the beak is a defining feature, so invest time in perfecting its form.
Step 3: Intricate Wing Folding Techniques
Advanced hummingbird models necessitate complex wing structures. Begin by employing a series of squash folds and petal folds to create layered wing sections. These folds add depth and dimension, mimicking the natural curvature of a hummingbird’s wings.
Focus on creating individual feather details through precise reverse folds along the wing edges. Varying the size and angle of these folds simulates the overlapping arrangement of real feathers. This meticulous work is crucial for achieving a realistic appearance.
Experiment with crimp folds to introduce subtle undulations and texture to the wings. These small details contribute significantly to the overall aesthetic. Remember to maintain symmetry between the wings for a balanced and harmonious design. Patience and precision are key to mastering these intricate techniques.
Step 4: Achieving Realistic Proportions and Form
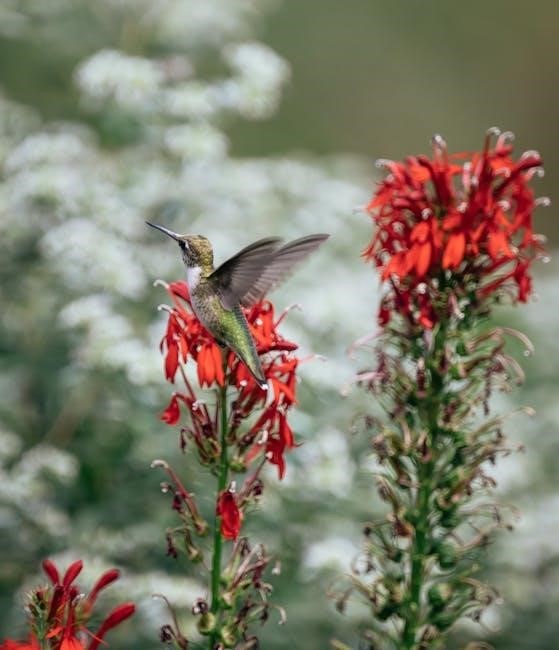
The final stage focuses on refining the hummingbird’s silhouette. Carefully observe real hummingbird anatomy – the delicate balance between the body, wings, and tail is paramount. Adjust the angles of the wings and tail to capture the bird’s dynamic posture, often poised in mid-flight.
Subtle curves and gentle shaping are essential. Use your fingers to mold the paper, creating a rounded body and a gracefully arched back. Pay close attention to the beak; a precise reverse fold can define its shape and length, contributing to the bird’s character.
Ensure the wingspan is proportionate to the body size. A slightly elongated body and relatively large wings will enhance the illusion of flight. This step demands a keen eye and a delicate touch to transform a folded paper model into a convincing representation of a hummingbird.
Troubleshooting Common Origami Hummingbird Issues
Encountering difficulties? A frequent issue is paper tearing, especially with complex folds. Using thinner, high-quality origami paper minimizes this risk. If a tear occurs, carefully mend it with a tiny piece of tape on the reverse side.
Another common problem is asymmetry. Ensure precise folds at each step; even slight misalignments accumulate, distorting the final form. Regularly check your work against diagrams, and don’t hesitate to unfold and restart if necessary.
Difficulty shaping the beak or wings is also typical. Gentle manipulation and patience are key. Utilize tools like tweezers for intricate folds. Remember, origami is a practice – don’t be discouraged by initial setbacks! Embrace the learning process and enjoy the journey of creation.
Paper Choice for Origami Hummingbirds
Selecting the right paper is crucial! For beginners, standard origami paper (kami) is ideal – it’s affordable and readily available in various colors. Its moderate thickness allows for easy folding without excessive tearing.
As you progress to intermediate and advanced models, consider using thinner papers like tissue foil or Japanese washi paper. These materials hold creases sharply, essential for detailed designs and intricate shaping. However, they are more delicate and require a gentle touch.
The color and pattern of your paper also impact the final result. Vibrant hues mimic a hummingbird’s iridescent plumage, while subtle patterns add visual interest. Experiment with different types to discover your preferred aesthetic. Remember, paper weight significantly influences the folding experience and the final model’s appearance.
Resources for Further Learning
Expand your origami horizons! Numerous online platforms offer video tutorials and diagrams for origami hummingbirds, catering to all skill levels. Websites like Origami Club and YouTube channels dedicated to origami provide step-by-step guidance.
Consider exploring books specifically focused on origami birds or animal designs. These resources often include a wider range of hummingbird models and detailed explanations of advanced techniques. Local libraries and bookstores are excellent places to start.
Engage with the origami community! Online forums and social media groups allow you to share your creations, ask questions, and learn from experienced folders. Participating in workshops or joining a local origami club can provide personalized instruction and inspiration.
Origami Hummingbird Variations and Designs
Beyond the basics, a world of hummingbird designs awaits! Explore variations focusing on different wing positions – hovering, mid-flight, or perched. Experiment with paper colors and patterns to mimic diverse hummingbird species, adding a touch of realism to your creations.
Advanced folders can attempt modular origami hummingbirds, constructed from multiple folded units interlocked to form the final model. These designs offer intricate detail and a unique structural aesthetic. Consider incorporating wet-folding techniques to create softer curves and more organic shapes.
Draw inspiration from other origami animal designs, adapting techniques to refine your hummingbird models. Don’t be afraid to personalize your creations with unique embellishments or artistic flourishes, showcasing your individual style and creativity!
Leave a Reply
You must be logged in to post a comment.