crochet beanie size guide
Mastering the art of crochet beanies starts with understanding proper sizing for a perfect fit. This guide offers essential tips, measurements, and patterns for all skill levels, ensuring your crochet projects turn out exactly as envisioned. Whether you’re a beginner or an experienced crafter, this comprehensive resource will help you create beanies that are both stylish and comfortable. Learn how to measure, choose the right materials, and adjust patterns to achieve professional results every time. Start your crochet journey with confidence and precision!
Importance of Proper Sizing
Proper sizing is crucial for a crochet beanie to ensure comfort, functionality, and a polished appearance. A well-fitted beanie stays in place, regulates temperature, and enhances the wearer’s style. Incorrect sizing can lead to discomfort, poor fit, or a beanie that slides off. Accurate measurements and understanding size charts help create a beanie that is both practical and visually appealing, making the effort worthwhile.
What to Expect from This Guide
This comprehensive guide provides a detailed roadmap for creating perfectly sized crochet beanies. It covers essential measurements, standard sizes for all ages, and the impact of materials like yarn and hooks. You’ll learn how to adjust patterns, understand gauge, and troubleshoot common fit issues. Whether you’re a beginner or experienced crafter, this guide offers practical tips and insights to ensure your beanie turns out exactly as you envision.
Understanding Basic Measurements
Accurate measurements are key to a well-fitting beanie. Focus on head circumference, beanie height, and desired fit style to ensure comfort and proper sizing.
Head Circumference Measurement
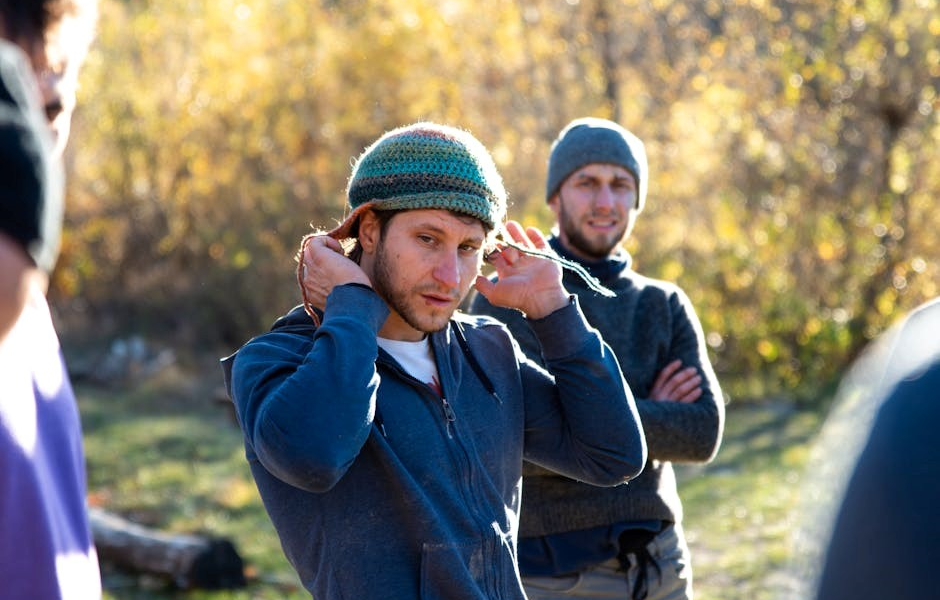
Measuring head circumference is essential for determining the correct beanie size. Use a flexible tape measure around the widest part of the head, just above the eyebrows and ears. Ensure the tape is snug but not tight for an accurate reading. This measurement helps create a beanie that is neither too tight nor too loose, ensuring comfort and proper fit. Record the measurement in inches or centimeters for pattern reference.
Standard Beanie Sizes for Adults
Adult beanie sizes typically range from Small to Extra-Large. Small fits head circumferences of 20-22 inches (50-55 cm), Medium fits 22-24 inches (55-60 cm), Large fits 24-26 inches (60-65 cm), and Extra-Large fits 26-28 inches (65-70 cm). These sizes are general guidelines and may vary slightly depending on the pattern or brand. Always consult a size chart for the best fit.
Standard Beanie Sizes for Children
Children’s beanie sizes are categorized by age, with varying head circumferences. Baby sizes (0-12 months) fit 16-18 inches (40-45 cm). Toddler sizes (1-3 years) fit 18-20 inches (45-50 cm). Youth sizes (4-10 years) fit 20-22 inches (50-55 cm). These sizes ensure a comfortable fit while accommodating growth. Always measure the child’s head for accuracy, as sizes can vary slightly by brand or pattern.
Standard Beanie Sizes for Babies
Baby beanie sizes are designed to fit various developmental stages. Newborn sizes typically fit a head circumference of 14-16 inches (35-40 cm), while 3-6 months fit 16-17 inches (40-43 cm). Sizes for 6-12 months accommodate 17-18 inches (43-45 cm). These measurements ensure a snug, comfortable fit without being too tight. Always consider the baby’s age and head size for the best fit, as sizes can vary slightly by brand or pattern.

Tools and Materials Needed
Essential tools include a measuring tape, crochet hooks in various sizes, yarn, scissors, and a tapestry needle. These ensure accurate sizing and a polished finish.
Measuring Tools
A flexible measuring tape is essential for determining head circumference accurately. It allows you to wrap the tape snugly around the head, ensuring a precise fit. When measuring, the tape should be level and neither too tight nor too loose. For those without a tape measure, a piece of string and a ruler can serve as alternatives to measure and mark the circumference effectively.
Crochet Hooks and Yarn
The right crochet hook and yarn are vital for achieving the desired size and fit. Hook sizes vary, and using the correct one ensures proper tension. Yarn weight, from bulky to lace, impacts the beanie’s thickness and drape. Always use the yarn and hook recommended in the pattern for consistency. Proper materials ensure your beanie meets size and fit expectations, while experimenting with different yarns and hooks can create unique results.
Impact of Yarn Weight and Hook Size
Yarn weight and hook size significantly affect the beanie’s size. Heavier yarns and larger hooks create looser stitches, while lighter yarns and smaller hooks result in tighter fabric.
How Yarn Weight Affects Size
Yarn weight plays a crucial role in determining the size of your crochet beanie. Thicker yarns create a denser fabric, resulting in a smaller beanie, while finer yarns produce a looser, larger fabric. Always ensure the yarn weight matches the pattern recommendations to maintain the desired size. Substituting yarn weights without adjusting the pattern can lead to sizing inconsistencies, so check the gauge to achieve the perfect fit and texture.
How Hook Size Affects Size
Hook size significantly impacts the size of your crochet beanie. A larger hook creates looser stitches, resulting in a bigger beanie, while a smaller hook produces tighter stitches for a smaller fit. Always use the hook size recommended in your pattern to ensure proper sizing. Adjusting hook size without altering the pattern or yarn weight can lead to inconsistent results. Gauge is key to achieving the right fit, so double-check your tension before starting your project.
Crochet Terminology
Understanding basic crochet terms like slip stitch, chain stitch, and single crochet is essential for following patterns. Familiarize yourself with common abbreviations to ensure accuracy in your projects.
Understanding Gauge
Gauge refers to the number of stitches and rows per inch in your crochet fabric. It ensures your beanie fits as intended by maintaining consistent tension. To measure gauge, crochet a swatch using the recommended hook and yarn. Count the stitches and rows in a 4×4 inch area. Proper gauge prevents a too-tight or too-loose fit. Always check gauge before starting your project to achieve accurate sizing.
Common Crochet Stitches
The most frequently used stitches for crochet beanies include the single crochet (sc), half double crochet (hdc), and double crochet (dc). These stitches are versatile and suitable for various yarn weights. The single crochet creates a dense fabric, while the half double crochet offers a slightly taller stitch. The double crochet provides an open, airy texture; Choosing the right stitch affects the beanie’s appearance and comfort, making it essential to select based on desired style and yarn weight.
Understanding Tension
Tension refers to how tightly or loosely stitches are crocheted, significantly impacting the size and fit of a beanie. Proper tension ensures the fabric lies flat without puckering or sagging. To achieve consistent tension, crochet evenly, avoiding tight or loose stitches. Checking your gauge swatch helps verify tension accuracy. Maintaining steady tension ensures your beanie fits as intended, making it essential for a professional finish.
Creating a Custom Size
Creating a custom size involves adjusting patterns to fit individual measurements. Calculate stitch counts based on head circumference and desired slouch. Swatch and adjust as needed for accuracy. Try on as you crochet to ensure fit. This method allows for personalized beanies tailored to any size or style. Happy crocheting! 😊
Adjusting Patterns for Different Sizes
Adjusting patterns for different sizes ensures a perfect fit for any head size or style preference. Start by understanding the basic measurements and calculating the required stitch count. Use your gauge to determine how many increases or decreases are needed. Modify the number of starting rounds or adjust the height by adding or removing rows. Always try on the beanie as you crochet to ensure accuracy. Happy crocheting! 😊
Calculating Stitch Counts
Calculating stitch counts is essential for ensuring your beanie fits perfectly. Begin by measuring the head circumference and determining the desired fit. Use your gauge to calculate how many stitches per inch you achieve. Divide the total head circumference by your gauge to find the number of stitches needed. For a beanie, start with an odd number of stitches to maintain symmetry. Adjust your calculations by adding or subtracting stitches in small increments to achieve the desired size. Always swatch to ensure accuracy, as yarn weight and hook size can significantly impact stitch count. This step ensures your beanie is tailored to the intended head size and style. Happy crocheting!

Ensuring a Perfect Fit
To ensure a perfect fit, try the beanie on the intended wearer as you crochet. Use stitch markers to track your progress and measure the height regularly. Compare it to standard sizing charts or the wearer’s favorite hat. Adjust the length by adding or removing rows before shaping the crown. Consider the stretch of the yarn and the ease desired for comfort. This step guarantees a beanie that fits both stylishly and comfortably.
Choosing the Right Pattern
Select patterns that match your skill level, desired style, and yarn weight. Ensure the pattern includes size options and clear instructions for customization and fit.
Selecting Patterns Based on Size
Choose patterns that align with your target size, whether it’s for adults, children, or babies. Use standard sizing charts to match head circumference to the pattern’s requirements. Consider the intended height and width of the beanie to ensure proper coverage and comfort. Patterns often include multiple sizes, so adjust stitch counts and rows based on gauge to achieve the desired fit. Start with standard sizes and modify as needed for personalized results.
- Refer to sizing charts for accurate measurements.
- Adjust stitch counts and rows based on gauge.
- Ensure proper fit for comfort and style.
Understanding Skill Levels
Choosing the right pattern involves understanding your skill level. Patterns are categorized as beginner, intermediate, or advanced. Beginner patterns use basic stitches and simple techniques, while intermediate patterns introduce more complex stitches and shaping. Advanced patterns require expertise in intricate designs and customization. Always read the pattern description to ensure it matches your skill level and confidence in crocheting. Start with simpler patterns and gradually progress to more challenging ones for better results.
- Beginner: Simple stitches and clear instructions.
- Intermediate: More complex stitches and shaping.
- Advanced: Intricate designs and customization.
Choosing the Right Style
Selecting the right style ensures your beanie complements the wearer’s personality and needs. Consider casual, slouchy, or fitted designs, as well as styles with earflaps for added warmth. Think about the recipient’s personal style, such as bold colors or subtle textures. Matching the style to the wearer’s lifestyle ensures the beanie is both functional and fashionable. This step enhances the overall appeal and usability of your crochet project.
- Casual: Perfect for everyday wear.
- Slouchy: Adds a trendy, relaxed look.
- Fitted: Ideal for a snug, warm fit.

Tips for Beginners
Start with simple patterns, use the right hook size, and practice basic stitches. Begin with a small project to build confidence and skill gradually. Always measure your work as you go to ensure the best fit and avoid common mistakes. Don’t pull the yarn too tight, as it can cause puckering or tightness. Use stitch markers to keep track of your place and maintain even tension. Count your stitches regularly to ensure accuracy and consistency. Watch video tutorials if written instructions are confusing. Join crochet communities for support and advice. Be patient with yourself; crochet is a skill that takes time to master. Celebrate small successes along the way to stay motivated. Try different yarn types to understand how they behave. Keep a notebook to jot down tips, mistakes, and favorite patterns. Start with acrylic yarn as it’s forgiving and easy to work with. Use a stitch dictionary to learn new stitches. Don’t be afraid to frogging (rip out) your work if something goes wrong—it’s part of the learning process. Always read through the entire pattern before starting to understand the steps involved. Swatch before starting a project to ensure the correct gauge. Use a tapestry needle to weave in ends neatly. Keep your tools organized to save time and reduce frustration. Take breaks to avoid hand fatigue and maintain even tension. Consider starting with a scarf or dishcloth to practice before making a beanie. Watch how the yarn drapes and how it feels in your hand to choose the right one for your project. Learn basic care tips for your finished items to keep them looking their best. Join a crochet class or workshop to get hands-on instruction and feedback. Participate in crochet challenges to push your skills and try new things. Share your finished projects online or with friends to get encouragement and feedback. Be kind to yourself if your first projects aren’t perfect—every crocheter starts somewhere. Use good lighting and comfortable seating to make crocheting enjoyable and prevent strain. Experiment with different colors to find what you enjoy working with. Don’t be intimidated by complex patterns; break them down into smaller steps. Use online resources like blogs and forums to find free patterns and tips. Take advantage of sales to stock up on yarn and supplies. Learn how to read yarn labels to understand fiber content, weight, and care instructions. Use a yarn needle to sew seams neatly and securely. Keep a small scissors handy to cut yarn as needed. Use a stitch counter app or tool to keep track of your progress. Try crocheting in different settings, like while watching TV, to make the time pass enjoyably. Share your passion with others by teaching them to crochet or gifting your creations. Celebrate the joy of creating something handmade and unique. Remember, the most important thing is to enjoy the process and have fun creating!
Starting Your First Beanie
Starting your first beanie can feel exciting but overwhelming. Begin by choosing a simple pattern and appropriate yarn weight for the season. Use the recommended hook size to ensure proper fit. Start by creating a foundation chain, then work in rounds or rows, depending on the pattern. Measure your work as you go to ensure the size matches your target. Don’t be discouraged if your first stitches are uneven—practice improves consistency. Use stitch markers to keep track of your place, and swatch beforehand to confirm gauge. Remember, it’s okay to make mistakes—they’re part of the learning process. Stay relaxed, maintain even tension, and enjoy the creative journey of crafting your first beanie!
Common Mistakes to Avoid
Common mistakes to avoid when crocheting a beanie include incorrect gauge, inconsistent tension, and not measuring regularly. Over-tight stitches can make the beanie too small, while loose stitches may result in a baggy fit. Forgetting to count stitches or misplacing markers can lead to misshapen designs. Always follow the pattern instructions, swatch beforehand, and use stitch markers to stay on track for a professional finish.
Reading Patterns

Reading crochet patterns requires attention to detail and understanding abbreviations. Always start by reviewing the materials list, gauge, and abbreviations section. Pay attention to stitch counts and row repeats. Follow instructions step-by-step, ensuring you complete increases, decreases, and shaping as directed. Misreading patterns can lead to sizing errors, so double-check your work and use stitch markers to keep track of your place.
Troubleshooting Fit Issues
Identify fit problems by checking gauge and measurements. Adjust hook size or yarn weight to resolve tightness or looseness. Ensure proper shaping for a balanced fit.
Why Your Beanie Might Be Too Tight
Your crochet beanie might be too tight due to a smaller hook size, tight stitches, or using a thicker yarn than recommended. Incorrect gauge, over-tightening stitches, or a smaller head circumference measurement can also cause this issue. Ensure you measure accurately and maintain consistent tension while crocheting. Adjusting your hook size or loosening your stitches can help achieve the perfect fit. Always double-check your gauge for accuracy.
Why Your Beanie Might Be Too Loose
Your crochet beanie might be too loose if you used a larger hook size or a lighter yarn weight than recommended. Loose stitches, incorrect gauge, or a pattern designed for a larger size can also cause this. Additionally, under-tightening stitches or not adjusting for yarn stretch can result in a slouchy fit. Check your gauge and consider tightening your stitches or using a smaller hook to achieve the desired snugness.
Fixing a Misshapen Beanie
To fix a misshapen beanie, assess the cause. Check if the hook size, yarn weight, or gauge is incorrect. Ensure stitch count matches the pattern. Adjust tension by loosening or tightening stitches. Try blocking the beanie to reshape it. Add shaping elements like darts or ribbing for structure. If needed, restart with a swatch to ensure proper gauge. Seek pattern adjustments or community advice for troubleshooting.
Maintenance and Care
Regularly wash your crochet beanie gently by hand with mild detergent. Avoid machine drying to prevent shrinkage. Reshape while damp and allow to air dry completely.
How to Care for Your Crochet Beanie
To maintain your crochet beanie, wash it gently by hand with mild detergent. Avoid machine washing to prevent damage. Gently reshape the beanie while it’s damp and lay it flat to air dry. Do not machine dry, as this can cause shrinkage or misshaping. Store the beanie in a cool, dry place to preserve its shape and yarn quality. For stubborn stains, spot clean with a soft brush and mild soap. Avoid exposing it to direct sunlight for extended periods, as this may cause fading. Regular care ensures your beanie remains soft, warm, and well-fitting for years to come.
Blocking Your Beanie
Blocking your crochet beanie enhances its appearance and fit. Start by wetting the beanie thoroughly, then gently remove excess water without twisting. Lay it flat on a towel, reshaping it to the desired form. Use pins to secure edges and specific stitches if needed. Allow it to air dry completely, which may take a day or two. Blocking evens out stitches, improves drape, and ensures a professional finish. Use a blocking mat or towel for best results, and avoid rush drying. This step ensures your beanie feels soft, fits well, and looks its best.
Storing Your Beanie
Store your crochet beanie in a cool, dry place to maintain its shape and quality. Use a breathable container or fabric bag to prevent moisture buildup. Avoid direct sunlight, as it may cause fading. Do not fold or stretch the beanie excessively, as this can cause misshaping. For long-term storage, place it flat or roll it gently, and consider adding tissue paper for support. This ensures your beanie remains pristine and ready to wear.

Resources and Further Reading

Explore books like The Crochet Bible by Moogly. Visit websites such as The Crochet Crowd. Join online communities like Ravelry and Crochetville for patterns and tips.
Recommended Books
For in-depth guidance, try The Crochet Bible by Moogly, offering detailed sizing charts. Crochet Geometry by Mamta Motiyani provides insights into shaping. The New Crochet Sampler by Rohn Strong includes patterns and tips; These books offer comprehensive advice on measurements, yarn choices, and stitch patterns, helping you create perfectly sized beanies. They are excellent resources for both beginners and experienced crocheters seeking to refine their skills.
Online Communities
Join online communities like Ravelry and Crochetville for support and resources. These platforms offer forums, patterns, and sizing tips from experienced crocheters. Facebook crochet groups and YouTube channels also provide tutorials and advice. Engage with these communities to refine your skills, troubleshoot fit issues, and discover new techniques for creating perfectly sized beanies. They are invaluable for both learning and sharing knowledge.
Video Tutorials
Video tutorials are an excellent resource for mastering crochet beanie sizing. Platforms like YouTube and Moogly offer step-by-step guides on measuring, stitching, and adjusting sizes. Channels like The Crochet Crowd provide demonstrations for achieving the perfect fit. These tutorials cover topics like gauge measurement, stitch counts, and troubleshooting. They cater to all skill levels, making it easier to learn and improve your crochet skills. Follow along to ensure your beanies are perfectly sized every time.
Congratulations on completing the crochet beanie size guide! With these tips, you’re ready to create perfectly fitting beanies. Happy crocheting! Remember, practice makes perfect—enjoy your journey!
Final Tips
Always measure carefully and swatch to ensure accuracy. Adjust patterns as needed for a perfect fit. Practice gauge consistency and don’t hesitate to tweak hook sizes or yarn weights. Keep notes for future projects and experiment with styles to find your favorites. Most importantly, enjoy the process and be proud of your creations. Happy crocheting!
Encouragement to Start Crocheting
Crocheting is a rewarding hobby that’s easy to learn and offers endless creativity. Start with simple projects like a beanie to build confidence. Don’t worry about mistakes—they’re part of the journey. Practice makes perfect, and soon you’ll enjoy the joy of wearing something you made. Join crochet communities for support, and remember, every stitch brings you closer to a handmade treasure; Dive in and embrace the fun!
Leave a Reply
You must be logged in to post a comment.